
Do you want to transform your cheap esp32-cam in a DIY surveillance camera with moton detection AND photo capture?
Look no further: this post explains STEP-BY-STEP all you need to know to build one yourself!
As I told you in the Easier, faster pure video Esp32-cam motion detection post, motion detection on the esp32-cam seems to be the hottest topic on my blog, so I thought it deserved some more tutorials.
Without question, to #1 request you made me in the comments was
How can I save the image that triggered the motion detection to the disk?
Well, in this post I will show you how to save the image to the SPIFFS filesystem your esp32-cam comes equipped with!
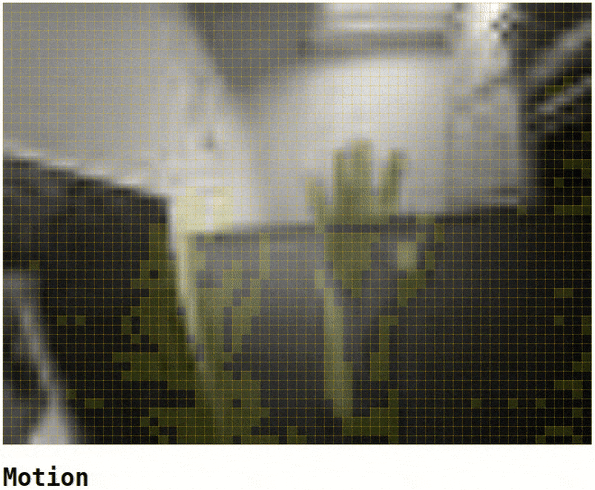
Motion detection, refactored
Please read the post on easier, faster esp32-cam motion detection first if you want to understand the following code.
It took me quite some time to write this post because I was struggling to design a clear, easy to use API for the motion detection feature and the image storage.
And I have to admit that, even after so long, I'm still not satisfied with the results.
Nonetheless, it works, and it works well in my opinion, so I will publish this and maybe get feedback from you to help me improve (so please leave a comment if you have any suggestion).
I won't bother you with the design considerations I took since this is an hands-on tutorial, so let's take a look at the code to implement motion detection on the esp32-cam or any other esp32 with a camera attached (I'm using the M5Stick camera).
First of all, you need the EloquentVision library: you can install it either from Github or using the Arduino IDE's Library Manager.
Next, the code.
// Change according to your model
// The models available are
//   - CAMERA_MODEL_WROVER_KIT
//   - CAMERA_MODEL_ESP_EYE
//   - CAMERA_MODEL_M5STACK_PSRAM
//   - CAMERA_MODEL_M5STACK_WIDE
//   - CAMERA_MODEL_AI_THINKER
#define CAMERA_MODEL_M5STACK_WIDE

#include <FS.h>
#include <SPIFFS.h>
#include "EloquentVision.h"

// set the resolution of the source image and the resolution of the downscaled image for the motion detection
#define FRAME_SIZE FRAMESIZE_QVGA
#define SOURCE_WIDTH 320
#define SOURCE_HEIGHT 240
#define CHANNELS 1
#define DEST_WIDTH 32
#define DEST_HEIGHT 24
#define BLOCK_VARIATION_THRESHOLD 0.3
#define MOTION_THRESHOLD 0.2

// we're using the Eloquent::Vision namespace a lot!
using namespace Eloquent::Vision;
using namespace Eloquent::Vision::IO;
using namespace Eloquent::Vision::ImageProcessing;
using namespace Eloquent::Vision::ImageProcessing::Downscale;
using namespace Eloquent::Vision::ImageProcessing::DownscaleStrategies;

// an easy interface to capture images from the camera
ESP32Camera camera;
// the buffer to store the downscaled version of the image
uint8_t resized[DEST_HEIGHT][DEST_WIDTH];
// the downscaler algorithm
// for more details see https://eloquentarduino.github.io/2020/05/easier-faster-pure-video-esp32-cam-motion-detection
Cross<SOURCE_WIDTH, SOURCE_HEIGHT, DEST_WIDTH, DEST_HEIGHT> crossStrategy;
// the downscaler container
Downscaler<SOURCE_WIDTH, SOURCE_HEIGHT, CHANNELS, DEST_WIDTH, DEST_HEIGHT> downscaler(&crossStrategy);
// the motion detection algorithm
MotionDetection<DEST_WIDTH, DEST_HEIGHT> motion;

void setup() {
    Serial.begin(115200);
    SPIFFS.begin(true);
    camera.begin(FRAME_SIZE, PIXFORMAT_GRAYSCALE);
    motion.setBlockVariationThreshold(BLOCK_VARIATION_THRESHOLD);
}

void loop() {
    camera_fb_t *frame = camera.capture();

    // resize image and detect motion
    downscaler.downscale(frame->buf, resized);
    motion.update(resized);
    motion.detect();

    if (motion.ratio() > MOTION_THRESHOLD) {
        Serial.println("Motion detected");

        // here we want to save the image to disk
    }
}
Save image to disk
Fine, we can detect motion!
Now we want to save the triggering image to disk in a format that we can decode without any custom software. It would be cool if we could see the image using the native Esp32 Filesystem Browser sketch.
Thankfully to the guys at espressif, the esp32 is able to encode a raw image to JPEG format: it is convenient to use (any PC on earth can read a jpeg) and it is also fast.
and thanks to the reader ankaiser for pointing it out
It's really easy to do thanks to the EloquentVision library.
if (motion.ratio() > MOTION_THRESHOLD) {
        Serial.println("Motion detected");

        // quality ranges from 10 to 64 -> the higher, the more detailed
        uint8_t quality = 30;
        JpegWriter<SOURCE_WIDTH, SOURCE_HEIGHT> jpegWriter;
        File imageFile = SPIFFS.open("/capture.jpg", "wb");

        // it takes < 1 second for a 320x240 image and 4 Kb of space
        jpegWriter.writeGrayscale(imageFile, frame->buf, quality);
        imageFile.close();
}
Well done! Now your image is on the disk and can be downloaded with the FSBrowser sketch.
Now you have all the tools you need to create your own DIY surveillance camera with motion detection feature!
You can use it to catch thieves (I discourage you to rely on such a rudimentary setup however!), to capture images of wild animals in your garden (birds, sqirrels or the like), or any other application you see fit.
Further improvements
Of course you may well understand that a proper motion detection setup should be more complex than the one presented here. Nevertheless, a couple of quick fixes can greatly improve the usability of this project with little effort. Here I suggest you a couple.
#1: Debouncing successive frames: the code presented in this post is a stripped down version of a more complete esp32-cam motion detection example sketch.
That sketch implements a debouncing function to prevent writing "ghost images" (see the original post on motion detection for a clear evidence of this effect).
#2: Proper file naming: the example sketch uses a fixed filename for the image. This means any new image will overwrite the older, which may be undesiderable based on your requirements. A proper way to handle this would be to attach an RTC and name the image after the time it occurred (something like "motion_2020-12-03_08:09:10.bmp")
#3: RGB images: this is something I'm working on. I mean, the Bitmap writer is there (so you could actually use it to store images on your esp32), but the multi-channel motion detection is driving me crazy, I need some more time to design it the way I want, so stay tuned!
I hope you enjoyed this tutorial on esp32-cam motion detection with photo capture: it was born as a response to your asking, so don't be afraid and ask me anything: I will do my best to help you!